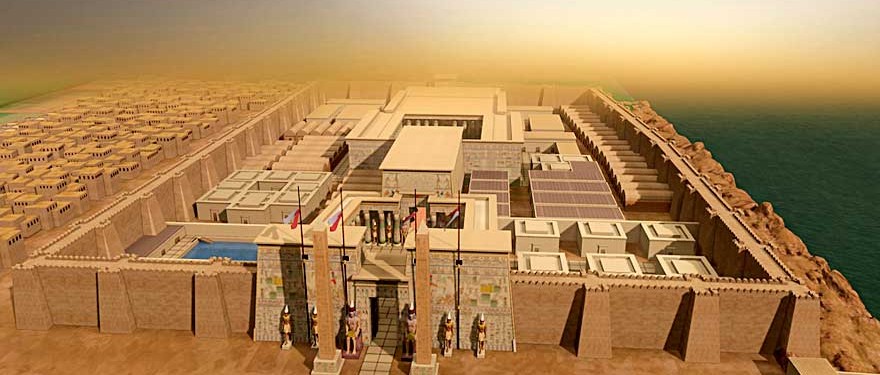
 3D Reconstruction of Luxor Temple
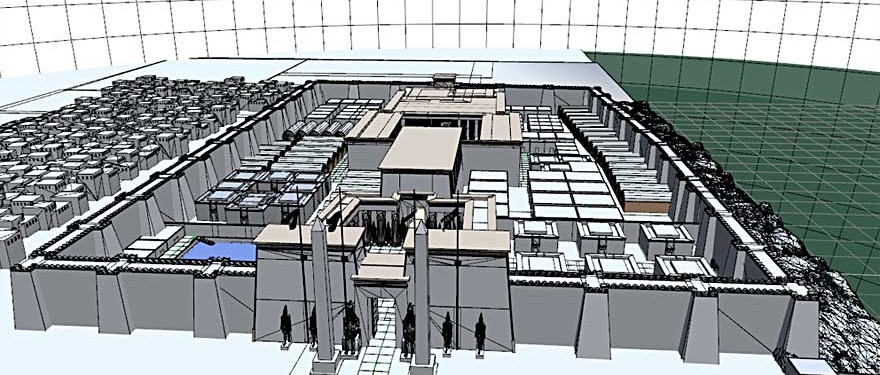
There are plenty of ground plans of ancient Egyptian temples available and recreating the actual buildings is not so difficult if you’re familiar with 3D CAD or other such software.
The shapes of the buildings are quite simple – the pylons and columns are made from modified cubes and cylinders and elements such as cornices are easily shaped.
The real difficulty is reproducing the decorations. When exploring an Egyptian temple it’s common to find whole sections of wall worn away, broken or missing and the paintwork, in most temples, was long ago destroyed. But from time to time it is possible to finds places – usually beneath ledges or under eaves – where the colour still remains. So there is enough surviving information to be able to make an educated guess of the pigments and colours used.
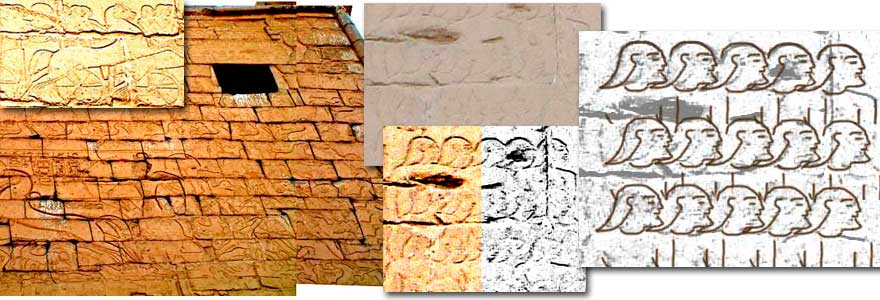
Sometimes it is difficult to make out the carved details of time worn walls. On large buildings the details are high up and hard to see. However, I over come these problems with a combination of research, photos enhanced in Photoshop to bring out the details and a bit of artistic license.
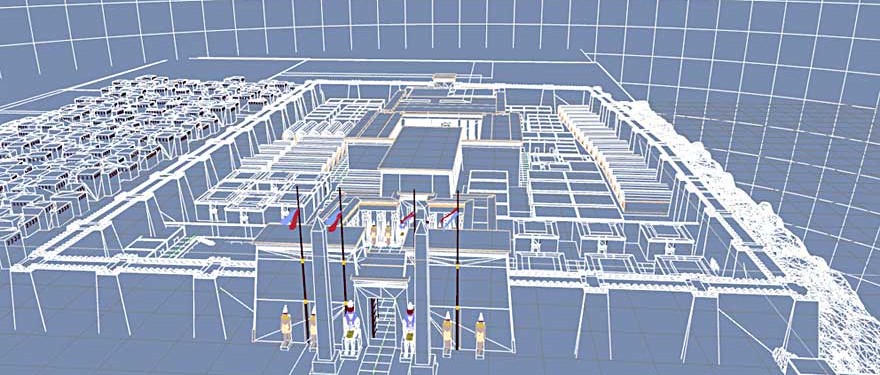
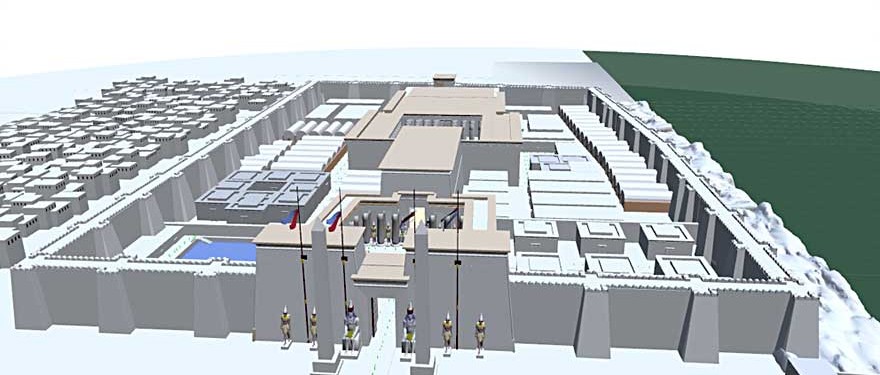
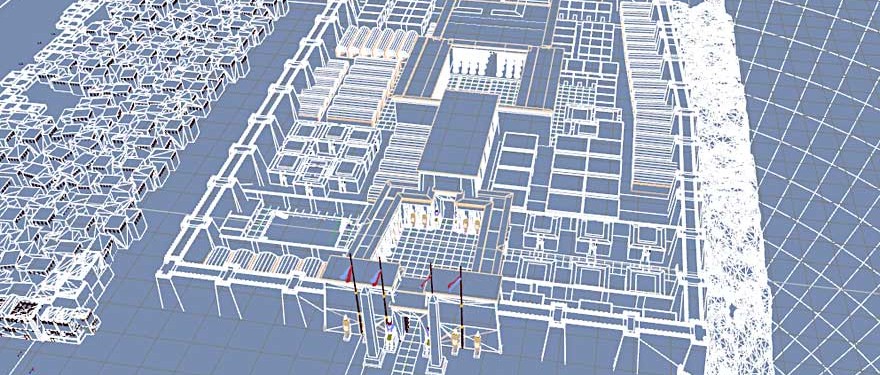 Luxor Temple complex Wire frame scene
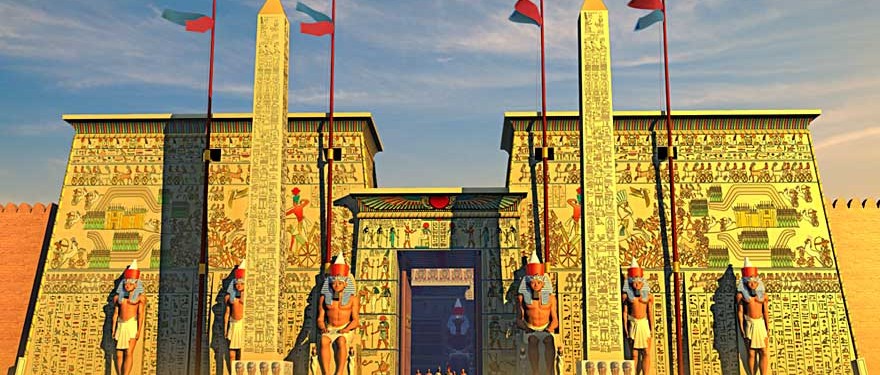
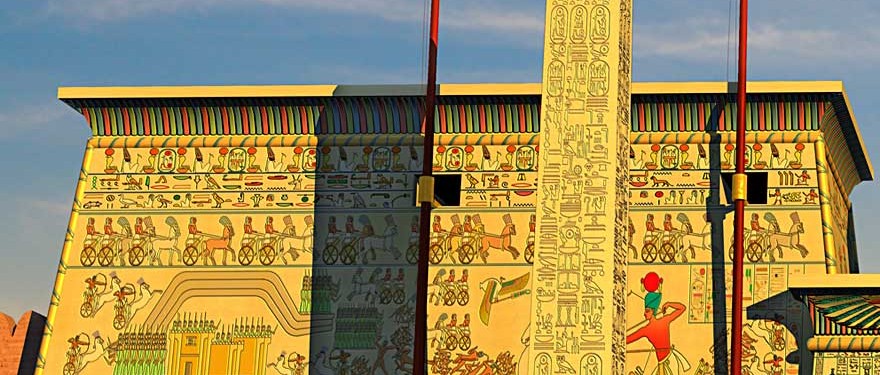
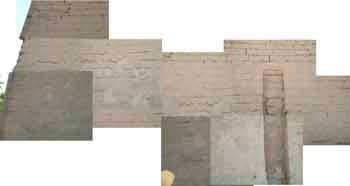
Over the years I’ve got to know Luxor temple quite well and on my 2005 visit I’d already planed how to photograph it before traveling to Egypt. My wife and I took over 400 detail photos of the pylon. They were made by dividing the walls of the pylon into an imaginary grid then taking overlapping photos along the grid framework.
The photos were then stitched together to make one very large photograph. The actual size of the image above is nearly four meters (about 12 and half feet) wide.
After the stitching was complete many of the details of the relief carvings cannot be seen without some further processing in Photoshop.
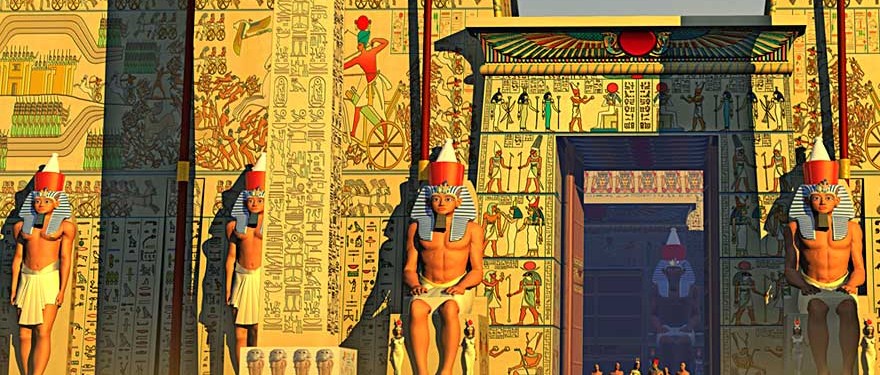
I traced over the enhanced photo on a separate layer to make a new image which was mapped to the surface of my model pylon. You can see the city of Kadesh surrounded by defensive walls, regiments of chariots parade across the walls and the details of a battle scene with Rameses II driving his chariot over the defeated enemy.
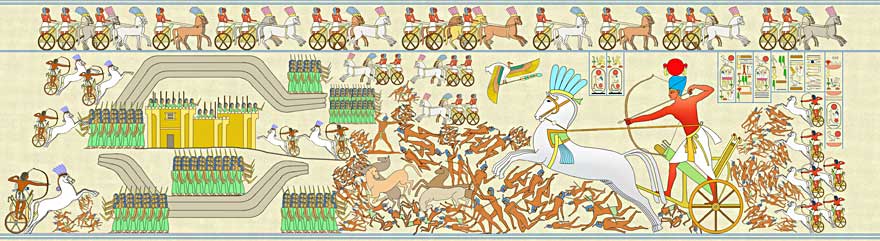
The finished drawing of the battle of Kadesh is called an ‘image map’ and is applied to a 3D object just like wall paper – In this case to the walls of the model pylon.
The six statues of Rameses II were the most complicated part of the reconstruction. The Pylon itself is all straight edges and made up of simple cubes that are easy to form into the right shapes. But the form of Rameses II has many curved shapes made up of thousands of polygons. There are also two small figures of his wife Nefertari that form part of the throne for the two seated statues. The easiest method was to break the statues up into components then to fit them together to create the finished object. The movie above demonstrates this in a simplified way – many of the components in the movie were themselves made up of separate components and the whole statue took over a week to complete
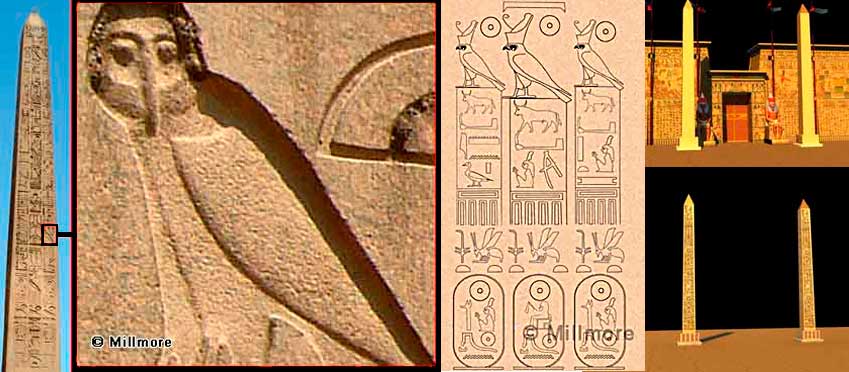
The Obelisks are easy to make but the image maps are highly detailed and are exact copies of the carved hieroglyphs. To archive the level of accuracy I divided the obelisk into sections and made a photo of each section but leaving an overlap. Then when I returned to England I joined these photos together using the photo merge facility in Photoshop. This gave me a 300dpi photo which is 2832 X 13369 pixels (9.5” X 44.5” inches) – (23.98 X 113.19cm)
I now have a scene with multiple objects and all their image maps – a pylon, gateway and gate six statues of Rameses II, the ground and two obelisks.
3D Reconstruction of Luxor Temple
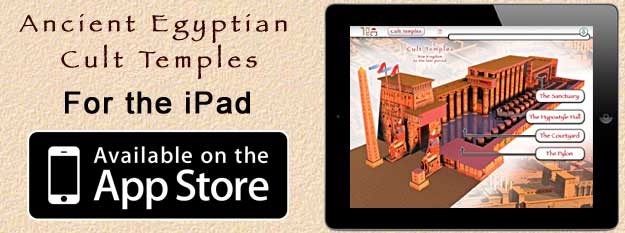
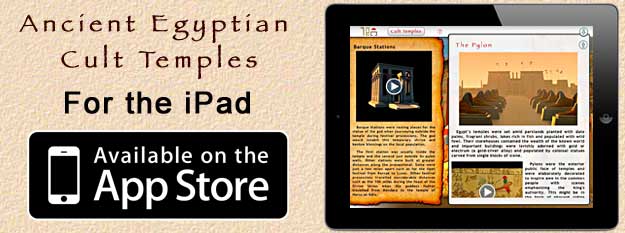

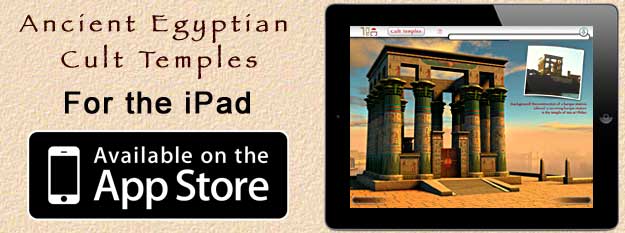
The mystery of Egyptian cult temples explained, illustrated with videos, photos, drawings and 30 highly detailed computer generated reconstructions.
